CSS Cascade Layers
One of the most common causes of confusion in CSS is facing specificity while writing styles. For example, changing the display value for an element never works because another element in the cascade overrides it due to having a higher specificity. Or when another element has !important That usually happens when the codebase is growing and we’re not organizing CSS in a way that prevents (or reduces) such problems.
To overcome the fights with the cascade and specificity issues, we need to be careful about where to write a specific CSS block. In small projects, this can be okay, but for large ones, it’s a time-consuming task. As a result, we started to see different methods to help us organize our CSS better and thus reducing the cascade issues. The first three that came to my mind are the BEM (Block, Element, Modifier), Smacss by Jonathan Snook and Inverted Triangle CSS by Harry Roberts.
In this article, we’ll explore how cascade layers work, and how they will help us write CSS with more confidence, along with use-cases and examples.
Are you ready? Let’s dive in!
Table Of Contents
- The problem
- Introducing CSS Cascade Layers
- Browser support
- Where do layers live in the cascade?
- Use cases for Cascade Layers
- More details about cascade layers
- Conclusion
- Further Resources
The Problem
The main problem cascade layers solve is providing a guaranteed way to write CSS without worrying about specificity and source order. Let’s take an example to illustrate the problem.

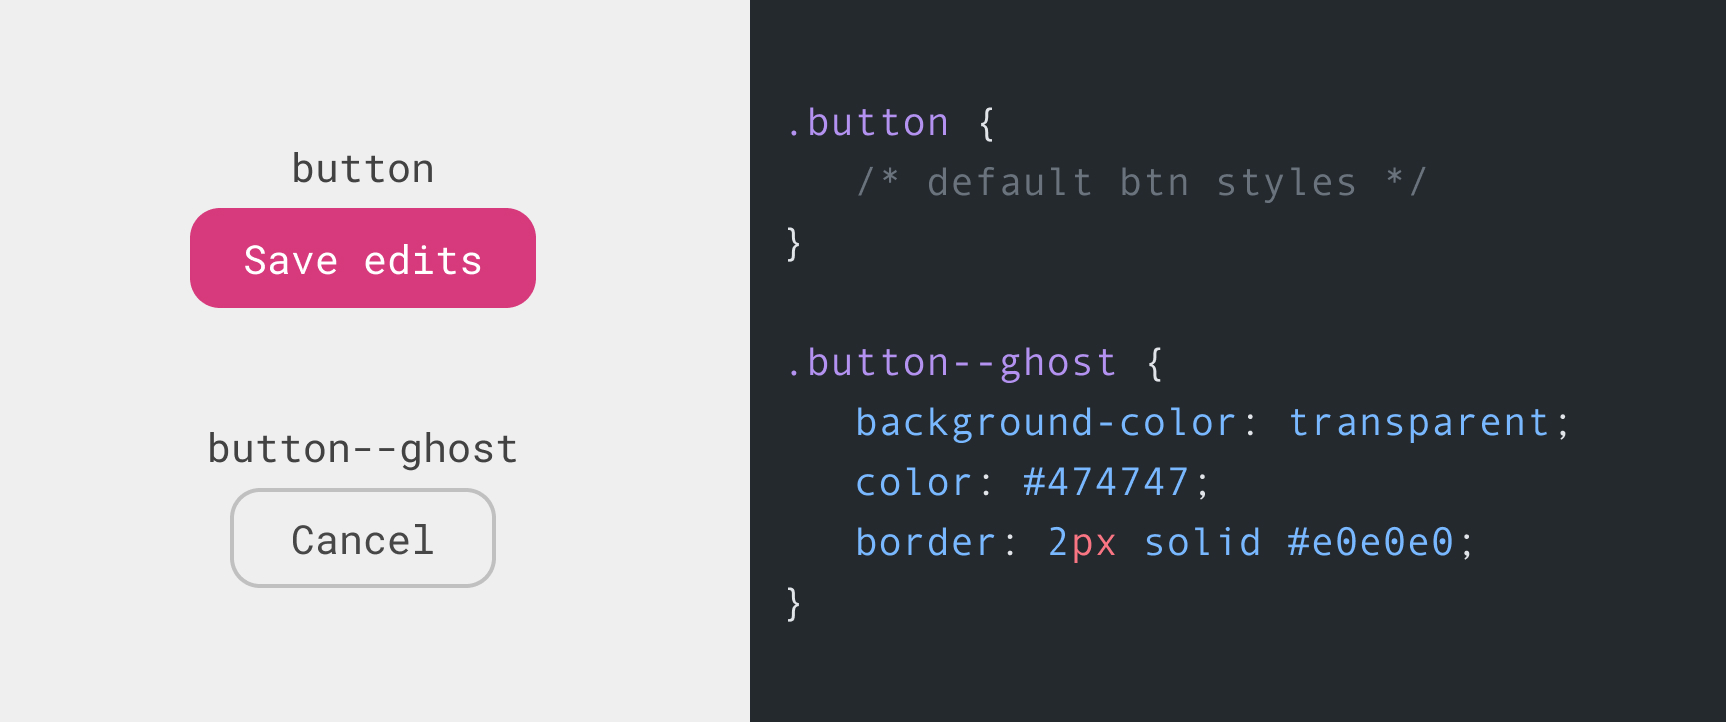
We have a button with two styles, the default and the ghost ones. In HTML, here how we will use them:
<footer class="form-actions">
    <button class="button">Save edits</button>
    <button class="button button--ghost">Cancel</button>
</footer>
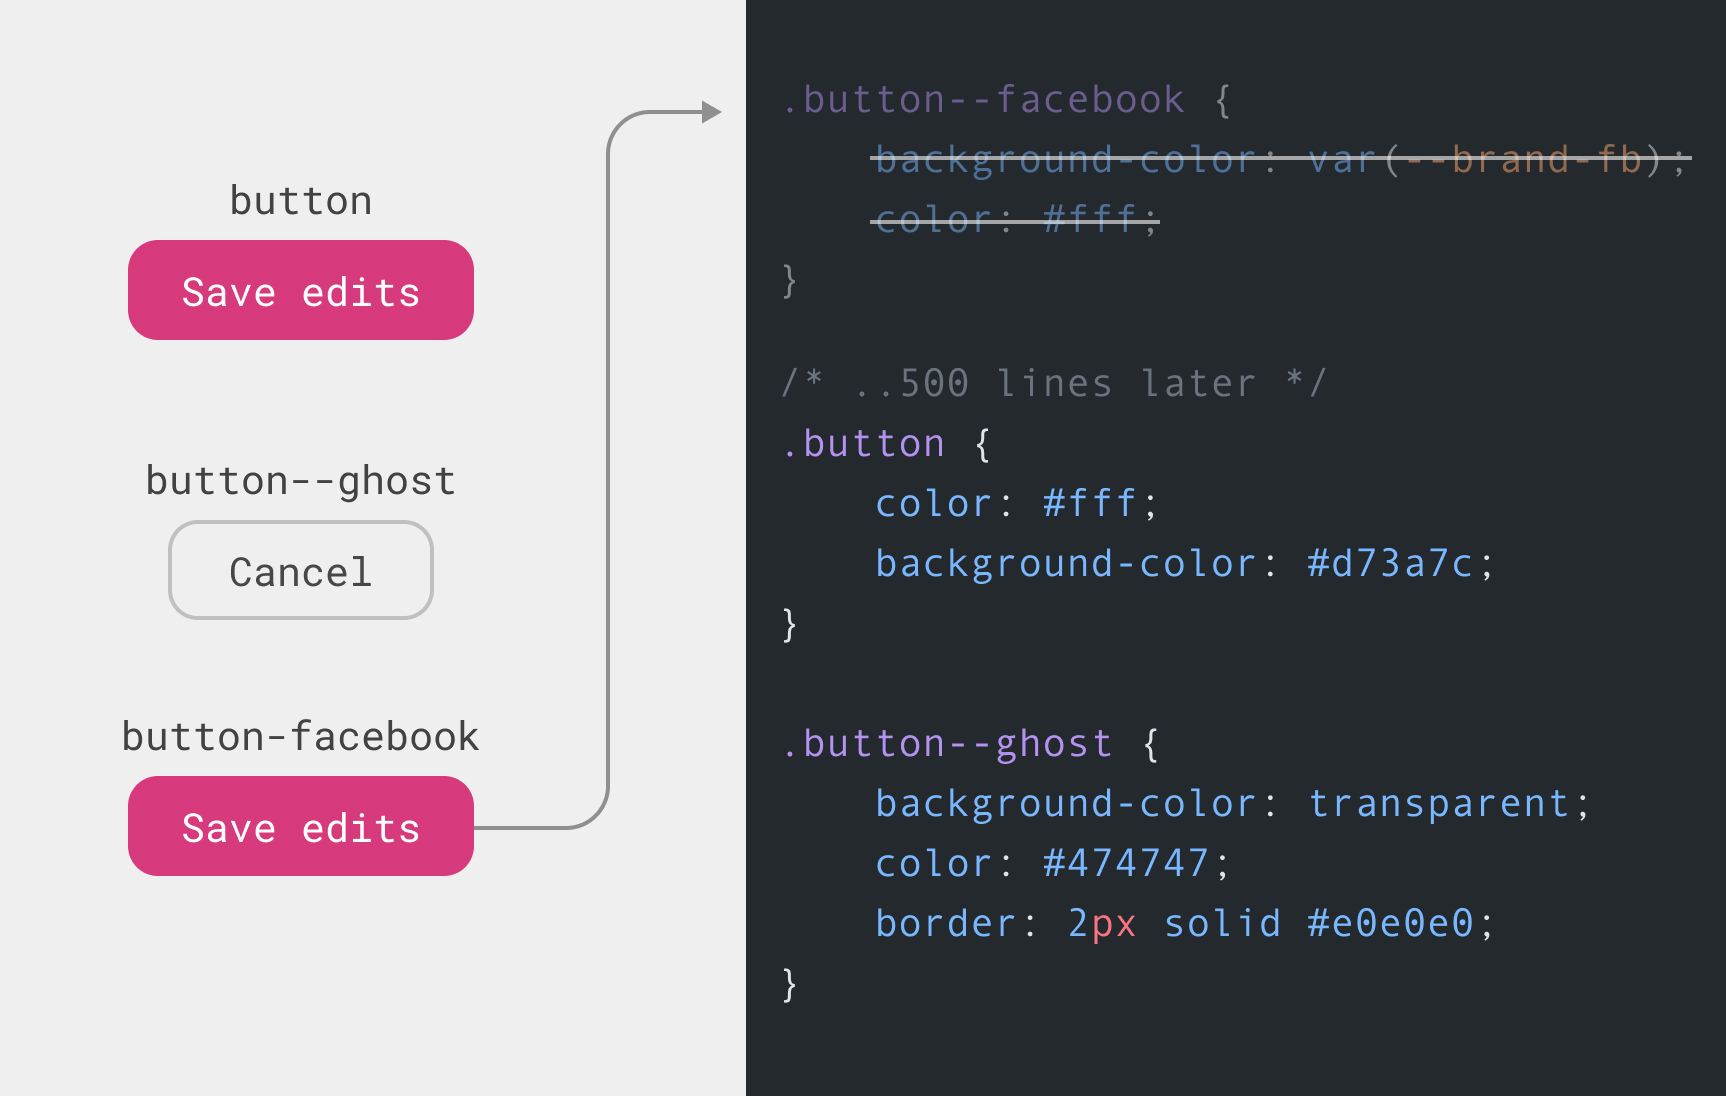
The above work great in that case. But what if we need to have a third variation for the button but we can’t write it right after the .button declaration?

The .button is coming after the .button--facebook. As a result, it will override it. In that case, we might workaround this by increasing the specificity for .button-facebook like:
.some-parent .button--facebook {
    background-color: var(--brand-fb);
    color: #fff;
}
Or we can do this (don’t do this at home!)
.button--facebook {
    background-color: var(--brand-fb) !important;
    color: #fff !important;
}
Either solution isn’t that good. The best one is to write them in the correct place, right after the .button declaration. It’s not an easy job to do that without getting help from a CSS pre-processor (like Sass, for example) to help in dividing the CSS files into partials and components.
Introducing CSS Cascade Layers
Cascade layers is a new CSS feature that will help us developers gain more control when we write CSS for large projects. According to the the spec author, Miriam Suzanne:
Cascade Layers will allow authors to manage their internal cascade logic, without relying entirely on the specificity heuristic or source order.
Let’s apply cascade layers to the previous example.
The first thing to do is to define a layer. To do that, we write @ followed by the layer name.
@layer components { }
I defined a layer called components. Within that layer, I need to add the default button styles.
@layer components {
    .button {
        color: #fff;
        background-color: #d73a7c;
    }
}
Cool. Next, we need to add another layer for the variations.
@layer components {
    .button {
        color: #fff;
        background-color: #d73a7c;
    }
}

@layer variations {
    .button--ghost {
        background-color: transparent;
        color: #474747;
        border: 2px solid #e0e0e0;
    }
}
Here is a visualization of the layers. There are similar to Photoshop layers since what’s defined last in CSS, will be the first in the list of layers in the visual.

Comments
Post a Comment